People say that a picture is worth a thousand words, and we agree 100%! That is why we upload a lot of images in our websites. In our quest to deliver the best experience for our visitors we strive for high quality and crisp images. This is very tricky because high definition images usually are VERY VERY BIG. Upload a few photos that are not resized and optimised for web and you will see that your website is getting slow, SNAIL LIKE SLOW.
Your visitors want to see your content and interact with it as soon as they hit the “Enter/return” button. If your website doesn’t load in reasonable time (2-5 seconds) you can be sure that they will never visit again. Furthermore slow loading times will be noticed by GOOGLE and this will negatively affect your ranking in the search engine.
Now, as we previously mentioned high quality images could be huge in size and they can significantly slow down your website. At the same time, having high quality images is very important to establish your credibility and to build a recognisable brand. So how to avoid this vicious circle?
Don’t worry, we have a few “tricks up in our sleeves” that can help you to optimise your website photos and images. The goal is to decrease their size, while at the same time not compromising their quality. The most popular way to optimise your photos for web is by using Photoshop by Adobe. The problem is that not everyone has the skills nor the access to this particular software.
That is why today we are going to show you how to do the same thing with an online tool (web-based app) called SQUOOSH. It is fast, free and easy to use even for beginners.
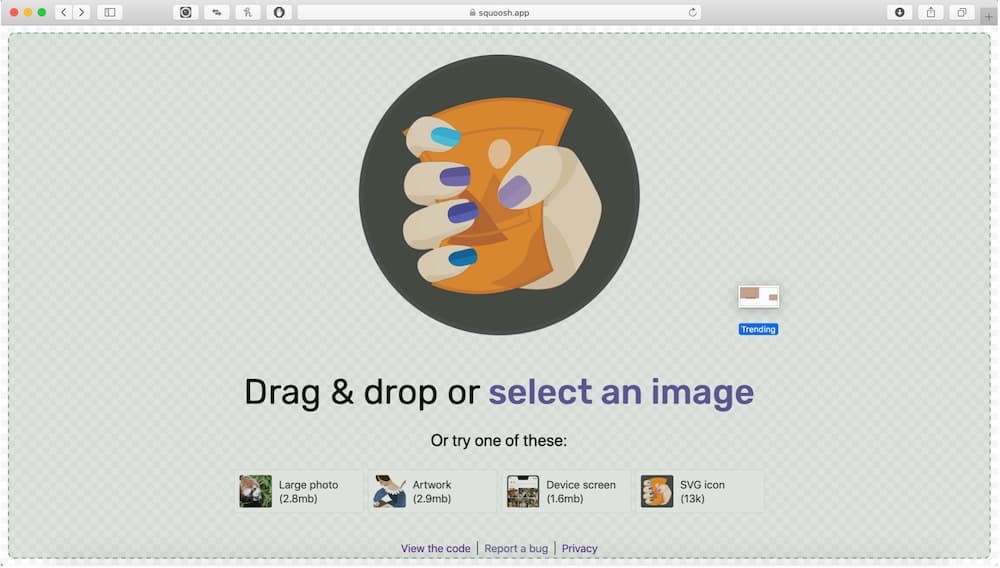
STEP 1. GO TO www.squoosh.app

STEP 2. DRAG AND DROP THE PHOTO/IMAGE that you want to save for web.
2.1 JPG Files (no transparency)

2.1.1. Original image size
2.1.2. Edit options
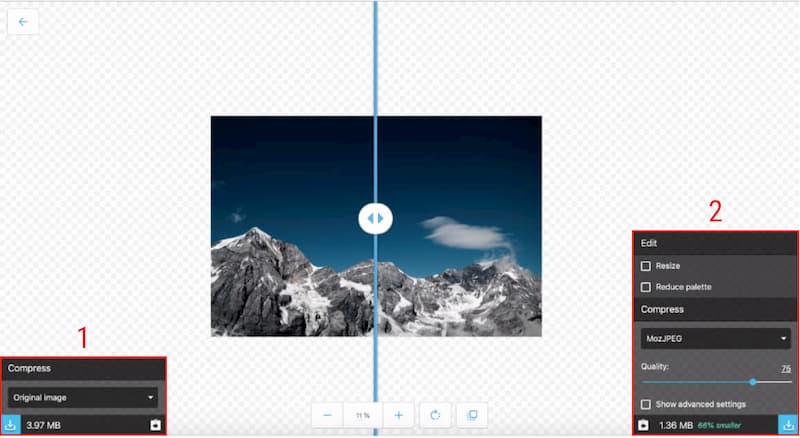
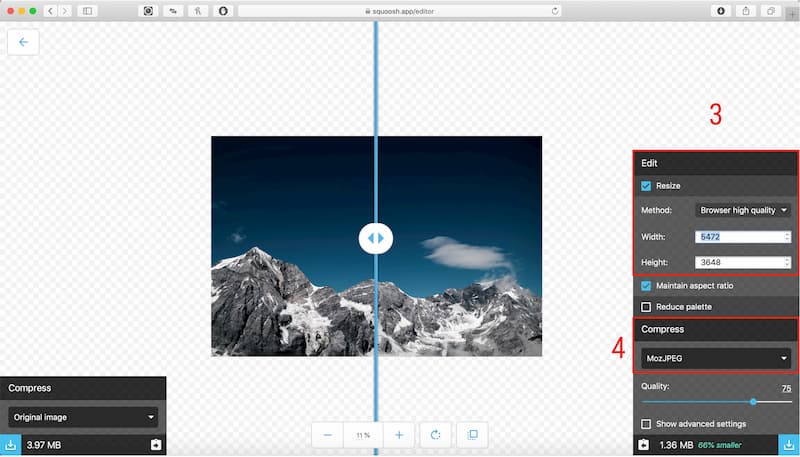
2.1.3. Resize – Change the resolution of the photo/image according to your needs
2.1.4. Keep the compress as “MozJPEG”
2.1.5. Play a bit with the quality slider until you find the sweet spot. While you make changes always pay attention to the file size. A good rule of thumb is to keep every image as small as possible (file size wise) without loosing too much of the quality. Our rule for file size – max 150KB.
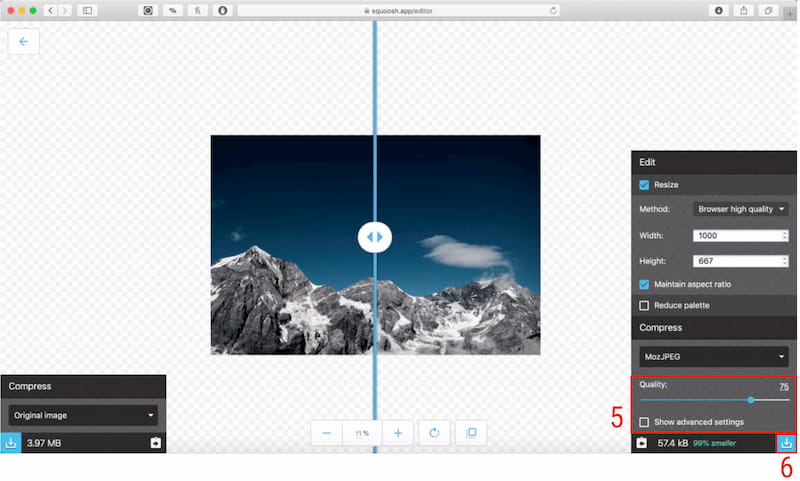
2.1.6. When you are ready click on the “Download” button in the lower right corner of your browser
2.2 PNG Files (with transparency)
2.2.1 Import
2.2.2 After the import the transparent parts will be black because the default compress type “MozJPEG” does not have transparency.
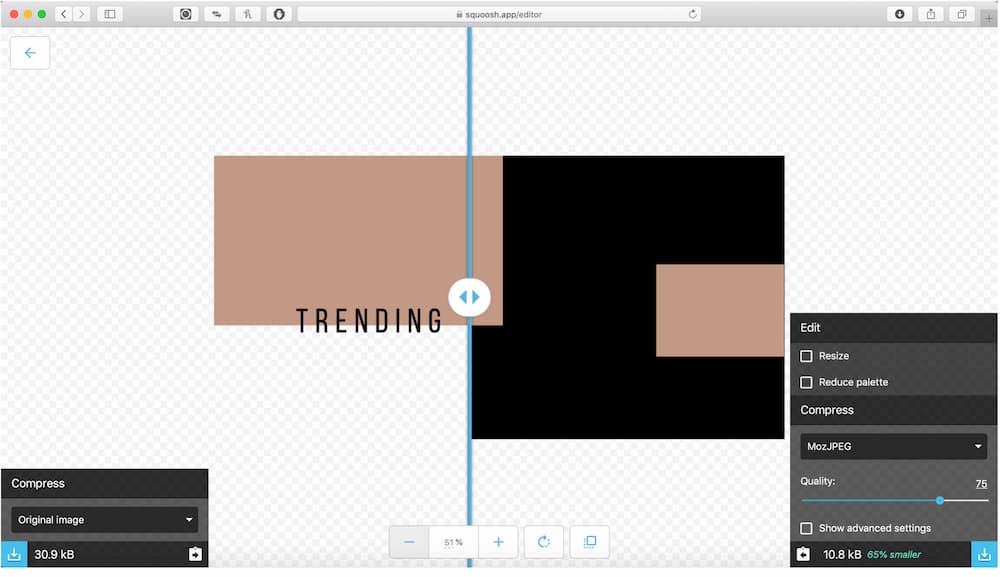
2.2.3 Change the compress type to “OptiPNG”. Once you change it you will see the transparency in the picture.

2.2.4 Resize the image and keep an eye on the file size
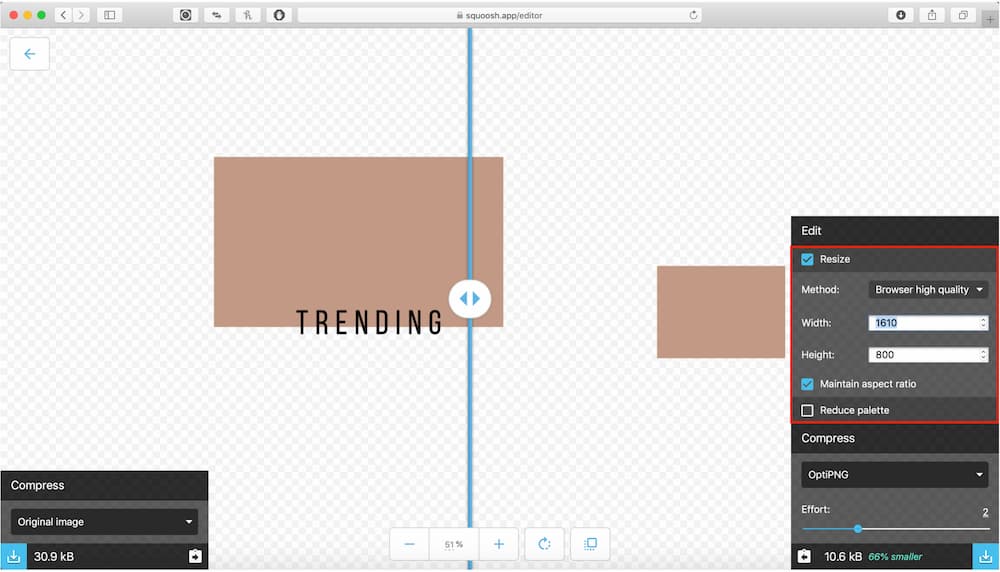
2.2.5 When you are ready click on the “Download” button in the lower right corner of your browser
And here you have it! Now you are ready to upload your optimised images to your website. Also make sure to properly name each image before uploading it, as this will help you further with optimising your website for the search engines. If you need more help with SEO, you can download our FREE Beginner’s Guide to SEO for Service-Based Entrepreneurs HERE.
If you have any questions, please let us know in the comment section bellow.



0 Comments